Raising Axolittles
Whether you purposefully bred your axolotls, or accidentally put a male and female in the same tank, these are the basic steps you should take when raising axolittles. If many of your eggs/babies are dying, check the Q&A or Health and Injury pages. The following is a timeline that describes the breeding and raising process, and what you should do at each stage along the way. For a more thorough and scientific breakdown, check out Axolotl.org.
Whenever handling axolotls or eggs, rinse your hands and arms thoroughly in hot water to remove any soap, lotion, or perfume residue. Those things can kill your axolotl.
Whenever handling axolotls or eggs, rinse your hands and arms thoroughly in hot water to remove any soap, lotion, or perfume residue. Those things can kill your axolotl.
Love Dance |
Breeding season is usually between December and June, but sometimes a sudden change in temperature from cool to warmer will trigger breeding. When this happens, the male will lay sperm-sacs called spermataphores (pictured above), and swim around the female. The male will try to push or lead the female to the egg sac, where she will rub her genitals on it and fertilize herself. Axolotls doing the love dance does not mean you will have fertilized eggs. Sometimes the females just don't feel like it. You will know if the love dance was successful soon, because the female should lay eggs the next day. If you don't want your axolotls to breed, you can put them in separate tanks, or use a tank separator.
|
Egg Laying |
If your female has been fertilized, she will lay eggs the very next day. Make sure you have many plants for her to lay on. (Having a separate tank for breeding is ideal). If she doesn't have enough plants, she may lay in the substrate or on filter parts. I suggest fake plants with smooth surfaces, as those are easiest to remove eggs from. Egg laying may take up to 12 hours. Female axolotls can lay between 100-700 eggs in one clutch, but the average is around 300. During this time, the female will grasp plants with her back legs and rub on them. Her genitals, or cloaca, will be swollen and red. While she is laying eggs, do not disturb her. If your axolotl pushes out anything other than eggs, such as something that looks like flesh, she may be fatally injured. In this case, you need to take her to a specialist. It is unlikely that this will happen, but be aware of it.
|
Remove and Maintain Eggs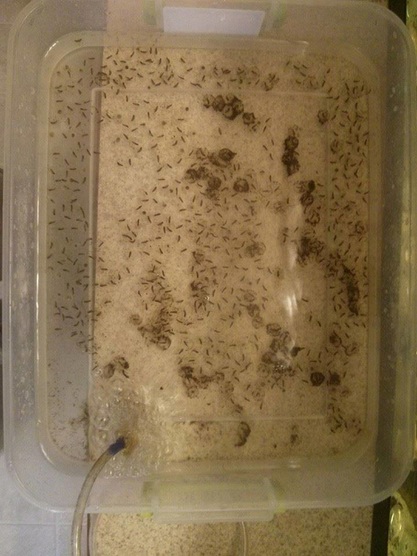
|
If you don't want to keep the eggs, you can leave them in the tank for the parent to eat. Or you can remove and freeze them ASAP to kill them before discarding them. NEVER just flush live eggs or babies down the toilet or sink. Make sure your hands are washed with hot water and no chemicals or soap. Fill a plastic bucket or tub with tank water. This is where you will move the eggs to. One plant/object at a time, remove it from the water and hold it over the water in the plastic tub. Use your fingernails to scrape along the surface of the plant. There is a gooey film connecting the egg to the plant, this is what you should scrape. Do not squish the eggs during this process, as you can pop them. As you scrape the surface of the plant, the goo will detach from it and the eggs will fall into the container.
The eggs should sit in their container in a single layer, covered with 1 inch of water. If you want to keep more water, make sure you use a bubbler to help give the eggs oxygen. It is vital they have oxygen at this point, and are kept near 64 degrees Fahrenheit. You should do water changes for the eggs once every few days. Make sure it's dechlorinated and the same temperature as the water they were in before (ideal water). As the eggs develop, you will notice some turning white and swelling. Those are dead eggs, and you should remove them ASAP. Dead eggs can be flushed or put down the sink. |
Egg Development |
If you keep eggs in a cold environment, they may take up to a month to hatch. They will hatch faster in a warm environment. It is best not to stress their metabolism and rush their development, so I suggest keeping them near 64 degrees Fahrenheit. Hatch time at a good temperature, with enough oxygen in the water, is between 2-3 weeks. During these weeks, you must simply continue maintenance of the eggs. Continue with bi-weekly, or daily, water changes using ideal water. You should spend this time procuring a food source for them, which I'll discuss next. Here is an axolotl emryo photo log from Axolotl.org. To the left, you can see a time lapse of their development. Be sure to check your eggs daily to remove dead eggs.
|
Feed the Hatchlings |
When they hatch you should have one of the following options: live daphnia ready, live white micro worms ready, or start your baby brine shrimp hatchery. Personally, a baby brine shrimp (BBS) hatchery is easiest. Daphnia and BBS are the most nutritious food, but you can supplement their diet with white micro worms.
You should do a full water change once a day, with ideal water. Feed babies at least once a day. Twice a day is preferable and will lead to faster development and fatter/bigger babies. If you are feeding them daphnia you don't need to clean the old food out. If you feed BBS, or other food that dies, you will need to do your daily water change around 6 hours after feeding to remove all dead food. Simply put the live food in the water near the babies, they will find it. You can buy live daphnia or daphnia cultures on Ebay. If you are using a daphnia culture, you will need to buy this as soon as the eggs are laid, so the food can develop and is ready when they hatch. You can buy BBS eggs on Amazon. If you use BBS for feeding your axolittles, you should start the hatchery the day the first egg hatches. See the videos to the left for BBS hatchery care. BBS are hatched in salt water, and salt water will kill your hatchlings. To prevent this, sift the BBS out of the salt water using a coffee filter. Rinse the BBS out of the coffee filter with ideal water. Then feed that to the axolittles. |
Separate Them |
Axolotl babies can become cannibalistic. It is best to separate them when they start growing their front legs. This will help you in two ways: 1) They won't bite each other when eating. Being injured hurts their growth speed and aesthetic. 2) It allows you to monitor their eating. I suggest bead-organizers. This is my favorite, because it allows you to adjust the size of each compartment as the axolittles grow. However, you can also keep many axolittles in one huge tub, as featured in the video to the left. If the babies have a lot of room, they will be less likely to bite. Allowing them more space does help prevent biting, but it is not guaranteed, and it doesn't help you monitor individual food intake. Whatever you keep them in, they should be able to turn around without bending, and be in 2-3 inches of water.
|
Adjust to their Growth |
You will need to adjust their food source as axolotls grow. They should be on daphnia or BBS when they're younger, but when they start getting their legs you can begin to introduce larger foods or dead foods to their diet. You can feed them with tweezers, eyedroppers, or your fingers (if they're clean).
When their mouths are big enough you can feed them live Tubifex. You can buy live Tubifex from AquaticFoods.com, but contact any seller of live Tubifex beforehand to see if they can ship to your area safely. You would need to chop these worms up with a knife, and then put them in the axolittle tubs. These are a great food source for young axolittles, because Tubifex is live and nutritious, and similar to frozen blood worms. When they begin to develop their back legs, they're generally ready to begin the switch to dead food. It works best if you start introducing frozen blood worms with their live food. They will begin to recognize the frozen blood worms as food, and you can phase out the live food. Eventually, at about 3 inches, they will be big enough to eat chopped up earthworms or red wrigglers. With these foods, you should rinse the dirt off and chop it into axolotl-bite-sized chunks. Some people experience issues with red wrigglers. They secrete a bitter taste, which axolotls do not like. You can get rid of this by blanching them first, or rinsing them in hot water. Once they are at least 2 inches long, and can't get sucked up into a filter, you can keep them in a fish tank if you prefer. For info on fish tank housing, please see the Food and Housing page. |
